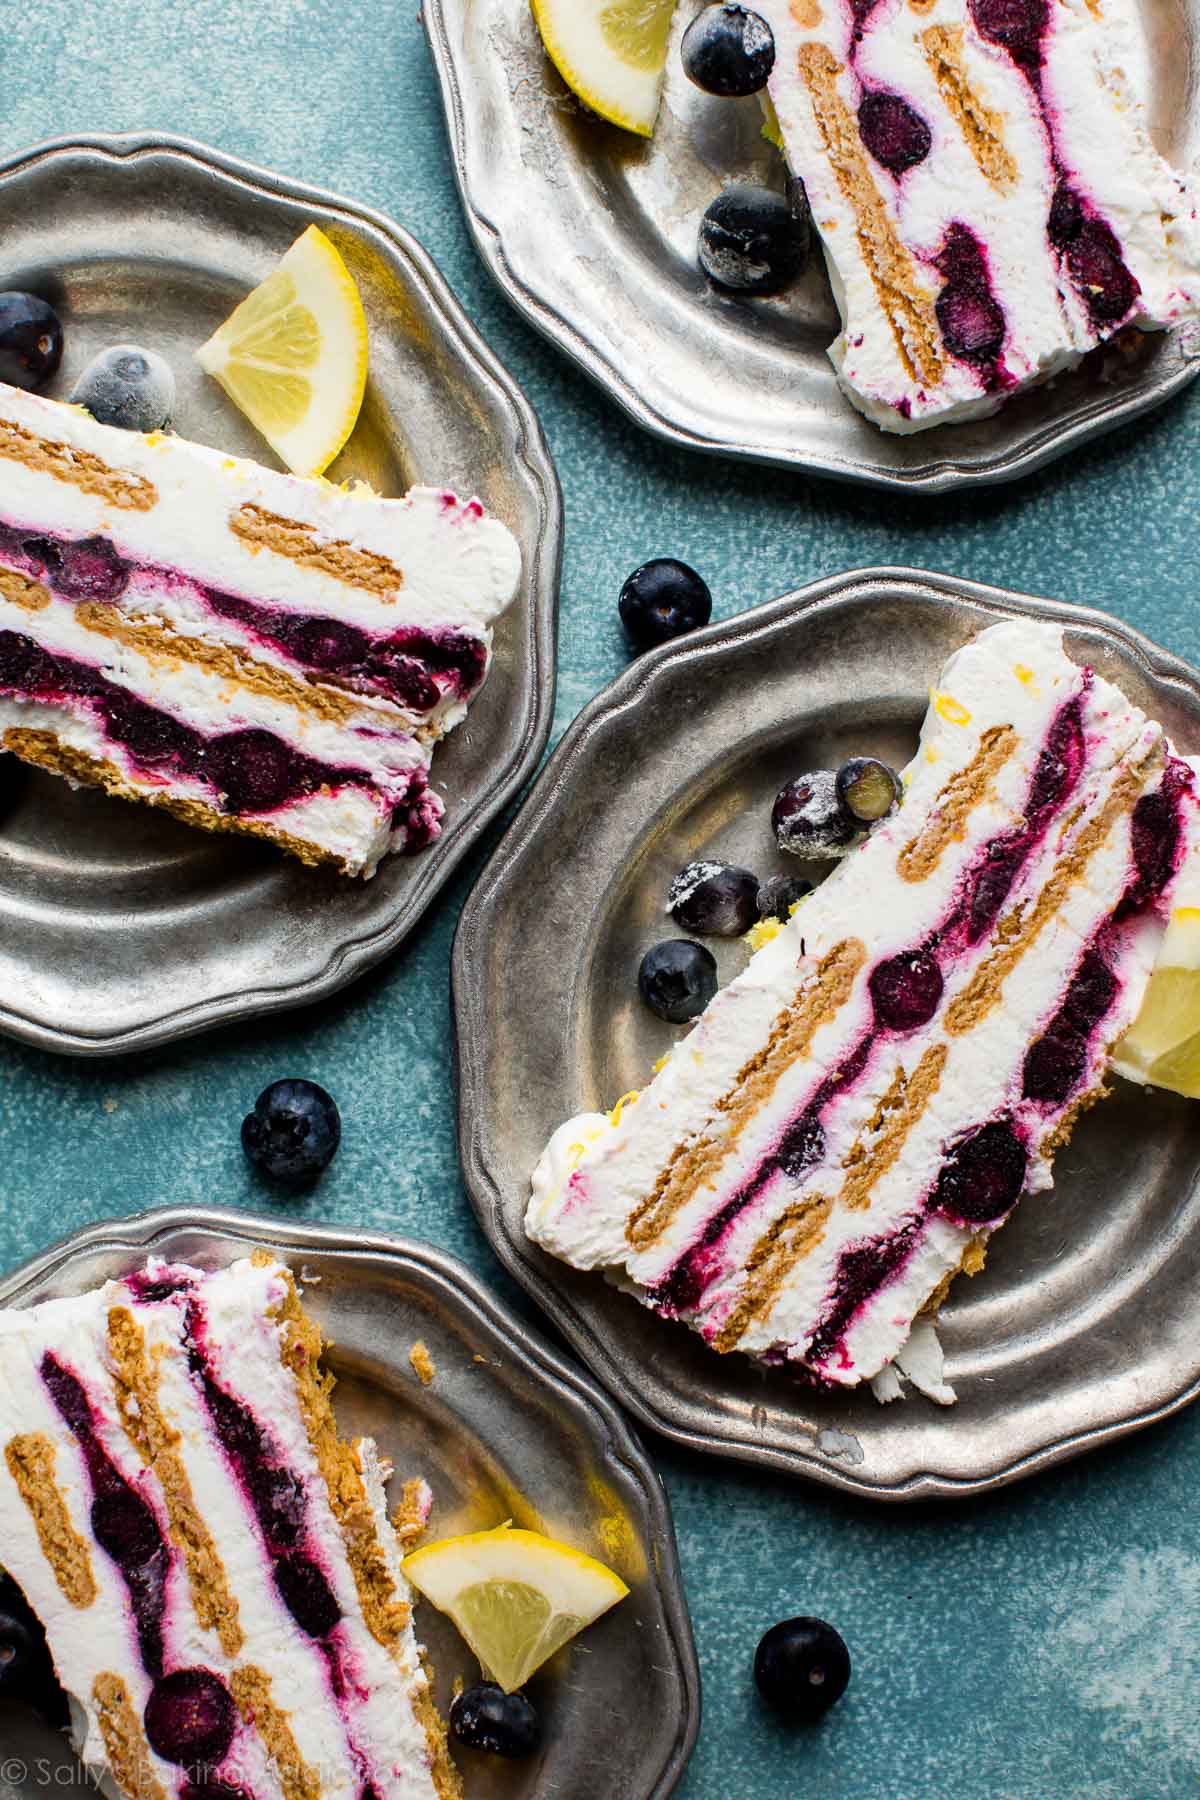
Red Velvet Jar Cake


 Red Velvet Jar Cake

Red Velvet Cake In A Jar offers a delightful new way to savor red velvet cake! Featuring strawberry cream cheese frosting, these miniature desserts are not only portable but also perfect for gifting and undeniably charming!

Red Velvet Cake In A Jar
When it comes to Valentine’s Day, the typical gifts often include “diamonds” and “bouquets of red roses.” While these gifts are lovely in a romantic comedy setting, many of us in reality may lack the funds—or the inclination—to present our loved ones with extravagant gemstones or excessively priced flowers.

However, who truly needs those clichés? This Valentine’s Day, I propose we bake our way into the hearts of our loved ones. After all, as the saying goes, cake is a girl’s best friend.

Red Velvet Cake In A Jar 
This Valentine’s Day, I plan to gift these delightful mini Red Velvet Cake Jars, and if I may say so, they are essentially the ideal present for anyone. Their red and pink hues make them perfectly themed for the holiday and suitable for those we cherish.
Yet, they maintain a level of neutrality, allowing you to present them to your child’s teacher or colleagues without any awkward romantic implications. (Perhaps skip the heart-shaped embellishments if you aim for a completely platonic atmosphere.)

The only individuals for whom these treats may not be suitable are those who abstain from desserts, but when you consider it, are those who avoid sugar truly a positive influence in your life? Choose your friends wisely, is all I’m suggesting.

Why Opt for Cake in a Jar?

Undoubtedly, preparing a sheet cake is simpler than putting together individual jars filled with cake and frosting. So, what motivates this extra effort?

Cake in a jar is not only portable but also makes for a delightful gift and is undeniably charming.
Indeed, we achieve the dessert trifecta with this creation! It serves as a wonderful present, is easy to transport (perfect for picnics, perhaps?), and can anything be cuter than these tiny desserts?

I have encountered numerous cake-in-a-jar recipes, yet many require baking the cake directly in glass jars and simply adding frosting on top. The idea of layering cut pieces of cake with frosting is far more enticing to me, as it allows for better control over the amount of cake (and frosting, yum!) that goes into the jar.

For frosting enthusiasts like myself, cake in a jar is arguably the greatest innovation since sliced bread. Hold on, scratch that; cake in a jar is FAR SUPERIOR to mundane sliced bread. It strikes the perfect balance of cake and frosting, which I consider the ideal ratio.

To elevate these jars a bit, I opted for strawberry rose cream cheese frosting instead of the usual cream cheese frosting. This variation is fruity, with a subtle floral note that pairs beautifully with the tangy cream cheese.

The strawberry powder imparts a robust, tangy berry taste and a lovely pink hue, all without the need for food coloring! (However, let’s not get too carried away with self-congratulation, as there is indeed a fair amount of food coloring in the red velvet cake.)

Ingredients for Cake in a Jar

Now, let’s discuss the necessary supplies! I purchased my jars from The Container Store (which I adore!), but there are numerous alternatives available on Amazon, and I have included one example below. Additionally, decorative cups or ramekins can be used if you do not plan to transport them and do not require a lid.

I experimented with two different sizes: 2-ounce jars and 4-ounce jars. I initially thought I would prefer the larger size (because bigger is always better, right?), but I was pleasantly surprised to find that I favored the smaller size.

The small 2-ounce jars serve as the ideal single portion for satisfying that craving for sweetness! By using 4-ounce jars, you can produce approximately 12 jars from the recipe; however, opting for the smaller jars allows for around 20, which translates to more for gifting and more for personal enjoyment!

Red Velvet Cake In A Jar 

In the photographs, I filled some jars to the brim, but for gifting purposes, it is advisable to leave some space for securely placing the lid on top. The jars can be adorned with heart-shaped candies, gummies, or simply Valentine’s-themed sprinkles!

Red Velvet Cake In A Jar 

In contrast to cupcakes or even slices of cake, cake in a jar remains fresh for a longer duration, owing to the ample frosting between the layers and the airtight seal of the jar. Therefore, this is an EXCELLENT option for a dessert that can be prepared in advance. I estimate that they can remain good for at least a week, likely closer to two weeks, when stored in the refrigerator; however, to be truthful, ours did not last that long. Enjoy!

💓More Red Velvet Cake Recipes

Recipe Notes
You may prepare these in jars of any size; however, I suggest opting for smaller jars, specifically 2-ounce or 4-ounce containers. If you choose to use 2-ounce jars, you will yield approximately 20 servings, whereas using 4-ounce jars will provide around 12 servings.


OTHER RECIPES

Ingredients

ICING:
  • 2 packages (8 ounces each) cream cheese, softened
  • 1 teaspoon vanilla extract
  • 2 cups confectioners' sugar
  • 1 tablespoon 2% milk
  • 16 half-pint jars

Directions

Grease a 13x9-in. baking pan.

Prepare cake mix batter according to package directions, adding pudding mix before mixing batter, and folding 1 cup chocolate chips into prepared batter. 

Transfer to prepared pan. Bake and cool as package directs. Cut into 1/4-inch cubes.

In a large bowl, beat cream cheese and vanilla until blended. Gradually beat in confectioners’ sugar and milk until smooth.

In each of 16 half-pint jars, layer 1/2 cup cake cubes, 1 tablespoon icing and 1 tablespoon remaining chocolate chips. 

Repeat layers. 

Refrigerate leftovers. 

Cool. Enjoy the Red Velvet Jar Cake recipes !!!

Red Velvet Jar Cake Video :


Too Much Chocolate Cake


Too Much Chocolate Cake 

A famously rich, ultra-moist chocolate cake packed with multiple chocolate elements—cake mix, pudding, sour cream, and chocolate chips—baked into a decadent bundt. This version expands the classic recipe with extra tips, improvements, and variations.


INGREDIENTS (LONG & DETAILED)

A. Core Cake Ingredients

  • 1 (15.25–18.25 oz) chocolate cake mix

  • 1 (3.9 oz) instant chocolate pudding mix

  • 1 cup sour cream

  • 1 cup vegetable oil

  • 4 large eggs

  • ½ cup warm water or brewed coffee

  • 2 teaspoons vanilla extract

  • 1 ½–2 cups semi-sweet chocolate chips (your choice: regular or mini)


B. Optional Deep-Chocolate Add-Ins

  • 2 tablespoons cocoa powder (extra depth)

  • 1 teaspoon espresso powder

  • ½ cup buttermilk (replace water for extra richness)

  • ¼ cup melted chocolate (stir into batter)


C. Chocolate Ganache Topping (Highly Recommended)

  • 1 cup heavy cream

  • 8 oz dark or semi-sweet chocolate, chopped

  • 1 tablespoon butter (for shine)


HOW TO MAKE THE CAKE (EXPANDED STEPS)

1. Prepare the Pan

  • Preheat oven to 350°F (175°C).

  • Thoroughly grease a 10-inch bundt pan with butter or spray.

  • Dust with cocoa powder (prevents white streaks).


2. Mix the Wet Ingredients

In a large bowl, whisk together:

  • Sour cream

  • Oil

  • Eggs

  • Water/coffee

  • Vanilla

Mix until creamy and smooth.


3. Add Dry Ingredients

Add:

  • Cake mix

  • Pudding mix

  • Optional cocoa

  • Espresso powder

Mix on low speed for 30 seconds, then high speed for 2 minutes until glossy and thick.


4. Fold in Chocolate Chips

With a spatula:

  • Gently fold in the chocolate chips.

  • Do not overmix—chips should be well distributed but not sink.

Tip: Toss chips with 1 tablespoon flour to keep them suspended in the batter.


5. Fill the Bundt Pan

Pour batter in evenly.
Tap the pan lightly to remove air bubbles.


6. Bake

Bake 50–60 minutes, or until:

  • A toothpick comes out with moist crumbs

  • The top springs back

Let cool 10 minutes before inverting onto a cooling rack.


CHOCOLATE GANACHE (LONG VERSION)

1. Heat the Cream

Warm heavy cream in a saucepan until steaming.

2. Add Chocolate

Pour cream over chopped chocolate in a bowl.
Let sit 1 minute.

3. Stir Slowly

Mix from the center outward until silky.
Add butter for shine.

4. Cool Slightly

Let ganache thicken 5–10 minutes.

5. Pour Over Cake

Drizzle over the top so it cascades down the sides.

Optional: Add extra chocolate chips or curls.


TEXTURE & FLAVOR NOTES (DETAILED)

This cake is:

  • Super moist from the pudding and sour cream

  • Dense yet soft, similar to bakery pound cakes

  • Loaded with chocolate chips throughout

  • Better the second day as flavors deepen


TIPS FOR THE BEST RESULT

Moisture Boosts

  • Substitute coffee for water

  • Add ¼ cup mayonnaise (bakery secret!)

  • Use buttermilk instead of water

Chocolate Flavor Enhancers

  • Add black cocoa for darker color

  • Add 1–2 tablespoons Dutch cocoa for intensity

  • Use dark chocolate chips for deeper flavor

Bundt Success Tips

  • Grease ALL crevices

  • Let cool at least 10 minutes before removing

  • Use a thin spatula if sides stick


STORAGE

  • Room temperature: 3–4 days (airtight)

  • Refrigerator: 1 week

  • Freezer: 3 months (wrap tightly, then thaw overnight)

Cake stays ultrasoft due to oil + pudding.


VARIATIONS (LONGER)

1. Triple Chocolate Explosion

Add:

  • ½ cup white chocolate chips

  • ½ cup dark chocolate chips

  • Drizzle with 2 kinds of ganache

2. Chocolate Raspberry Cake

3. Mocha Overload Cake

  • Replace water with strong coffee

  • Add 1 tablespoon espresso powder

  • Top with mocha glaze

4. “Blackout” Version

  • Add ½ cup black cocoa

  • Use dark chocolate ganache only

  • Sprinkle crushed chocolate wafers on top

5. Stuffed “Center Surprise” Version

Insert into batter halfway:

Creates a gooey center!


OTHER RECIPES

Try this boxed cake mix recipe...! 

boxed cake mix INGREDIENTS 

 * 1 (18.25 ounce) package devil's food cake mix 
 * 1 (5.9 ounce) package instant chocolate pudding mix 
 * 1 cup sour cream 
 * 1 cup vegetable oil 
 * 4 eggs 
 * 1/2 cup warm water 
 * 2 cups semisweet chocolate chips 

boxed cake mix INSTRUCTIONS 

 1. Preheat oven to 350 degrees F (175 degrees C). 
 
2. In a large bowl, mix together the cake and pudding mixes, sour cream, oil, beaten eggs and water. Stir in the chocolate chips and pour batter into a well greased 12 cup bundt pan.
 
3. Bake for 50 to 55 minutes, or until top is springy to the touch and a wooden toothpick inserted comes out clean. Cool cake thoroughly in pan at least an hour and a half before inverting onto a plate If desired, dust the cake with powdered sugar. The boxed cake mix recipe is ready to serve....nice !


Too Much Chocolate Cake Video :

Frog Cupcakes


Frog Cupcakes 

Adorable frog-faced cupcakes with rich frosting, candy eyes, big smiles, and a moist cupcake base underneath. Perfect for kids’ parties, spring events, or anyone who loves cute character baking.


INGREDIENTS

A. Vanilla (or Chocolate) Cupcakes

  • 1 ½ cups all-purpose flour

  • 1 cup granulated sugar

  • 1 ½ teaspoons baking powder

  • ½ teaspoon baking soda

  • ½ teaspoon salt

  • 2 large eggs (room temperature)

  • ½ cup vegetable oil

  • ¾ cup buttermilk (or milk + 1 tsp vinegar)

  • 2 teaspoons vanilla extract

  • ¼ cup melted butter (optional for richness)

Chocolate option:
Replace ¼ cup flour with ¼ cup cocoa powder.


B. Frog Green Buttercream


C. Decorations (Frog Face Features)

Choose one style or mix them:

Eyes

  • White chocolate melts + black icing

  • Marshmallow slices + chocolate chips

  • Candy eyeballs

Mouth & Details

  • Black piping gel

  • Melted chocolate

  • Red icing (for tongue)

Nostrils

  • Chocolate sprinkles

  • Mini chocolate chips

  • Dots of black gel

Extra Decorations (optional)


HOW TO MAKE THE CUPCAKES

1. Preheat the Oven

  • Set oven to 350°F (175°C).

  • Line a cupcake pan with 12 liners.


2. Mix Dry Ingredients

In a bowl, whisk together:

  • Flour

  • Baking powder

  • Baking soda

  • Salt


3. Mix Wet Ingredients

In another bowl, whisk:

  • Eggs

  • Sugar

  • Oil

  • Buttermilk

  • Vanilla

  • Melted butter (optional)

Whisk until smooth and pale.


4. Combine Batter

Pour dry mixture into wet mixture.
Stir gently until just combined—do not overmix.


5. Bake

Fill cupcake liners about 2/3 full.
Bake 16–20 minutes, or until a toothpick comes out clean.
Cool completely before decorating.


HOW TO MAKE THE FROG FROSTING

1. Beat Butter

Beat butter 2–3 minutes until pale and whipped.

2. Add Powdered Sugar

Add 1 cup at a time until smooth.

3. Add Vanilla & Milk

Add enough milk to create spreadable consistency.

4. Color It

Add green gel food coloring until you get a bright frog green.

Tip: Gel food coloring keeps buttercream thick and stable.


ASSEMBLY — FROG FACE DECORATING (DETAILED)


1. Frost the Cupcakes


2. Add Frog Eyes

Choose one:

A. Marshmallow Eyes

  • Slice marshmallows diagonally.

  • Stick chocolate chips into the sticky side.

B. Candy Eyeballs

  • Press gently into the top of the frosting.

C. Fondant Dome Eyes

  • Roll small white balls, flatten them, add black fondant dots.

Place the eyes at the back/top of the dome like a cartoon frog.


3. Add a Frog Smile

Using black gel or chocolate:

  • Pipe a wide curved smile.

  • Add a tiny upward curve at each end (cute expression).

Optional:


4. Add Nostrils

Use:

  • 2 sprinkles

  • 2 dots of black gel

  • 2 mini chocolate chips

Place them between the eyes and the smile.


5. Optional Fancy Additions

  • Add green fondant eyelids for more expression.

  • Place the cupcake on blue sprinkles to resemble a pond.

  • Add candy flowers for a lily pad look.


ADVANCED DECORATING STYLES

1. “Kawaii Frog” Style

  • Bigger eyes

  • Tiny mouth

  • Blush cheeks using pink dust or food coloring

2. “Realistic Frog” Style

  • Two-tone greens (light + darker green piping)

  • Fondant pupils

  • Subtle shading with edible dust

3. “Frog Prince Cupcakes”


STORAGE

  • Room temperature: 1–2 days

  • Refrigerator: 4–5 days

  • Freezer (unfrosted cupcakes): up to 2 months

Decorated cupcakes store best in a cupcake box.

OTHER RECIPES

boxed cake INGREDIENTS 

 * 1 (18.25 ounce) package white cake mix 
 * 1 (16 ounce) can prepared vanilla frosting 
 * 6 drops green food coloring, or as needed 
 * 1/4 cup green decorator sugar 
 * 12 large marshmallows 
 * 48 semisweet chocolate chips 
 * 1 drop red food coloring 

 boxed cake DIRECTIONS 

 1. Bake cupcakes according to the directions on the package. Allow them to cool completely. 
 2. Scoop 2/3 of the frosting into a small bowl and mix with green food coloring. Frost the cupcakes. Sprinkle some of the green sugar over the tops. 
 3. Cut the marshmallows in half to make two circles. Dip half of each marshmallow piece into water and dip into the green sugar to make the eyelids. The remaining white will be the eyes. Place on the cupcakes. Use a little bit of white icing to glue a chocolate chip into the center of each eye for the pupil. 
 4. Mix the remaining frosting with red food coloring to make pink. Use the pink icing to draw smiling mouths and nostrils or even tongues on the frogs. The boxed cake mix recipe is ready...great ! golden-rum-cake.

Boxed Frog Cupcakes Video :


Nice Homemade Twinkies


Nice Homemade Twinkies

Soft golden sponge cakes with fluffy vanilla cream filling—just like the iconic snack, but fresher, richer, and better.

You can bake these in a real canoe-shaped pan, mini loaf pans, or even DIY foil molds.


INGREDIENTS

A. Sponge Cake Batter

  • 1 cup all-purpose flour

  • 1 teaspoon baking powder

  • ¼ teaspoon fine salt

  • 4 large eggs, separated

  • 1 cup granulated sugar

  • ¼ cup whole milk

  • 1 teaspoon vanilla extract

  • 2 tablespoons melted butter (optional for richer cakes)


B. Classic Cream Filling

(Soft, fluffy, not overly sweet — crème pâtisserie + marshmallow style)

  • ½ cup unsalted butter, softened

  • ½ cup shortening (for authentic fluffy texture)

  • 1 cup powdered sugar

  • 1 teaspoon vanilla extract

  • ¼ cup marshmallow creme or fluff

  • 1–2 tablespoons heavy cream (as needed)

  • Pinch of salt


HOW TO MAKE THE CAKE MOLDS (DIY OPTION)

If you don’t have special pans:

  1. Tear 8 sheets of heavy aluminum foil.

  2. Wrap each sheet around a small spice container or cardboard tube to form a rounded “canoe.”

  3. Remove the form and gently shape the foil so it stands on its own.

  4. Spray the inside with nonstick spray.

These bake beautifully and give you the classic shape.


STEP-BY-STEP: MAKING THE SPONGE CAKES

1. Preheat & Prep

  • Preheat oven to 350°F (175°C).

  • Grease and flour your molds. Set on a baking tray.


2. Mix Dry Ingredients

Whisk together:

  • Flour

  • Baking powder

  • Salt

Set aside.


3. Beat Egg Yolks

In a bowl, beat egg yolks + ½ cup sugar until pale, thick, and creamy (about 3 minutes).
Mix in milk, vanilla, and melted butter.


4. Whip Egg Whites

In a clean bowl, whip:

  • 4 egg whites

  • Remaining ½ cup sugar (added slowly)

Beat until stiff, glossy peaks form. This gives the cakes their signature airy texture.


5. Combine Gently

Using a spatula:

  1. Fold the egg yolk mixture into the whites.

  2. Add dry ingredients in very gentle folds.

  3. Stop as soon as the flour disappears.

The batter must stay fluffy.


6. Fill Molds

Fill each mold 2/3 full—they rise a lot.


7. Bake

Bake 10–13 minutes until:

  • Tops are golden

  • Cakes spring back to the touch

Cool completely before filling.


CREAM FILLING — DETAILED METHOD

1. Beat the Fats

Beat butter + shortening for 3 minutes until very fluffy.

2. Add Sugar & Vanilla

Mix in powdered sugar, vanilla, and salt. Continue beating.

3. Add Marshmallow Creme

This gives the classic light, slightly stretchy cream.

4. Adjust Texture

Add heavy cream 1 teaspoon at a time until:

  • Smooth

  • Spreadable but still firm

  • Whips into soft peaks


FILLING THE CAKES

  1. Use a chopstick or small straw to poke three holes in the bottom of each cake.

  2. Transfer the cream filling to a piping bag with a small round tip.

  3. Pipe cream into each hole until the cake plumps slightly.

  4. Wipe off excess and let set 10 minutes.

TIP:
Refrigerate for 20 minutes for the filling to set firmer.


STORAGE

  • Room temp: 2 days

  • Fridge: 1 week (best!)

  • Freezer: Up to 2 months

    • Wrap tightly; thaw 1 hour before eating.

They taste even better chilled.


OPTIONAL VARIATIONS (LONGER DETAIL)

1. Chocolate Twinkies

  • Replace ¼ cup flour with cocoa.

  • Add 2 tablespoons melted chocolate to the batter.

  • Fill with chocolate mousse or chocolate marshmallow cream.

2. Strawberry-Filled Twinkies

3. Banana Cream Twinkies

4. “Birthday Cake” Twinkies

  • Add rainbow sprinkles to batter and filling.

  • Flavor filling with almond+vanilla mix.


OTHER RECIPES

....a nice boxed cake mix recipe to try ! 

 INGREDIENTS 
 * Cake: 
 * 4 eggs 
 * 1/2 cup butter, melted and cooled to lukewarm 
 * 1 cup water 
 * 1 (5.1 ounce) package instant vanilla pudding mix 
 * 1 (18.25 ounce) package yellow cake mix 
 Filling: 
 * 1/2 cup butter, room temperature 
 * 1 (8 ounce) package cream cheese, room temperature 
 * 5 cups confectioners' sugar, sifted 
 * 1 (8 ounce) container frozen whipped topping, thawed 
 * 1 teaspoon vanilla extract 

 INSTRUCTIONS 

 1. Preheat an oven to 350 degrees F (175 degrees C). Grease and flour two 10x15 inch jelly roll pans. 2. Beat the eggs until combined; stir in the melted butter. Add the water, pudding mix, and yellow cake mix, stirring well to combine. The batter will be very thick. Divide the batter between the prepared pans, spreading it evenly. 
 3. Bake until the cakes spring back when pressed lightly with a finger or a tester comes out clean, 15 to 20 minutes. Cool completely on wire racks. 
 4. To make the filling, combine the room-temperature butter, cream cheese, and confectioners' sugar. Beat until smooth. Stir in the whipped topping and vanilla extract. 
 5. When the cakes are cool, spread the filling mixture on top of one cake layer. Place the second cake layer on top of the first, and cut into bars. Wrap each bar in plastic wrap and store in the freezer. The box cake mix recipe is ready to serve....enjoy!


Nice Homemade Twinkies Video:


Homemade Chocolate Cake Mix


Homemade Chocolate Cake Mix

A rich, moist, deeply chocolatey mix made entirely from scratch. Just combine the dry ingredients, store it in an airtight container, and when you're ready to bake, simply add the wet ingredients and bake. This makes one full 2-layer cake or 24 cupcakes.


DRY MIX INGREDIENTS (Store Ahead)

  • 2 cups all-purpose flour

  • 1 ¾ cups granulated sugar

  • ¾ cup unsweetened cocoa powder (natural or Dutch-process)

  • 1 tsp baking powder

  • 2 tsp baking soda

  • 1 tsp fine salt

  • ½ cup powdered milk (optional but great for richness & shelf stability)

  • 2 Tbsp cornstarch (helps keep the mix lump-free and more tender)

Optional add-ins for extra flavor


HOW TO MAKE THE DRY MIX

  1. Sift flour, cocoa powder, baking powder, baking soda, and cornstarch into a large bowl.

  2. Add sugar, salt, powdered milk, and any optional dry flavorings.

  3. Whisk thoroughly until the mix looks even and uniform.

  4. Transfer to an airtight jar, zip bag, or container.

  5. Label with:

    • Chocolate Cake Mix — Add: 2 eggs, 1 cup water, ½ cup oil, 1 cup buttermilk (OR 1 cup water + 2 Tbsp vinegar), 1 tsp vanilla.”

    • Date of preparation.

Storage Life

  • Room temperature: up to 3 months

  • Refrigerator: 6 months

  • Freezer: 1 year


WHEN READY TO BAKE — WET INGREDIENTS

Add these to one full batch of the dry mix:

  • 2 large eggs (room temp)

  • 1 cup warm water

  • ½ cup vegetable oil (or melted butter for richer texture)

  • 1 cup buttermilk

    • (OR 1 cup water + 2 Tbsp vinegar/lemon juice mixed and rested for 5 min)

  • 1 tsp vanilla extract


HOW TO BAKE THE CAKE

1. Prepare the pans

  • Grease and flour two 8-inch pans, OR

  • One 9×13-inch pan, OR

  • Line 24 cupcake wells.

2. Mix the batter

  1. In a mixing bowl, whisk the eggs, oil, buttermilk, water, and vanilla.

  2. Add the cake mix.

  3. Beat with a hand mixer or whisk for 2 minutes until smooth.

  4. Batter will be thin — this is normal for moist chocolate cakes.

3. Bake

  • 8-inch rounds: 30–35 minutes

  • 9×13 inch: 35–40 minutes

  • Cupcakes: 18–22 minutes

Cake is done when:

  • A toothpick comes out clean, or

  • The center springs back lightly when touched.

4. Cool Completely

Cooling makes the crumb firmer and improves chocolate flavor.


OPTIONAL ENHANCEMENTS (FOR BETTER-THAN-BOXED RESULTS)

Make it extra moist

  • Add 2 Tbsp mayonnaise to the wet ingredients (yes—classic bakery trick).

  • Swap water for hot coffee.

Make it darker or richer

  • Increase cocoa from ¾ cup to 1 full cup.

  • Add 2 Tbsp black cocoa.

Make it sturdier for stacking

  • Add ¼ cup additional flour to the dry mix.

  • Use all butter instead of oil.

Add mix-ins

  • 1 cup chocolate chunks

  • ½ cup chopped nuts

  • 1 cup mini marshmallows for “rocky road” cake


CHOCOLATE BUTTERCREAM TO GO WITH IT (LONGER VERSION)

Ingredients

  • 1 cup unsalted butter, softened

  • 3 cups powdered sugar

  • ½ cup cocoa powder

  • ¼ cup heavy cream or milk

  • 1 tsp vanilla extract

  • Pinch of salt

Directions

  1. Beat butter 3 minutes until pale and fluffy.

  2. Add powdered sugar and cocoa gradually.

  3. Stream in cream until you reach your preferred consistency.

  4. Add vanilla and salt; beat 2 minutes more.

  5. Frost cooled cake generously.


TIPS FOR THE BEST HOMEMADE CAKE MIX

  • Sift the cocoa to avoid bitterness pockets.

  • Keep the mix airtight — exposure to humidity reduces rising power.

  • Always add warm water — it blends better with cocoa.

  • Make multiple batches and store them in labeled jars for quick baking.


OTHER RECIPES

Ingredients
  • 1 3/4 cups (220g) all-purpose flour
  • 2 cups (400g) sugar
  • 3/4 cup (90g) cocoa powder
  • 1 1/2 teaspoons (7g) baking powder
  • 1 1/2 teaspoons (7g) baking soda
  • 1 teaspoon (5g) salt
  • 2 eggs, room temperature
  • 1 cup (227mL) whole milk
  • 1/2 cup (119mL) vegetable oil
  • 2 teaspoons (30mL) McCormick® vanilla
  • 1 cup (227mL) coffee, warm

Instructions

Whisk together the flour, sugar, cocoa, baking powder, baking soda and salt in a medium bowl. Store in an airtight container in a cool dry place for up to 3 months until ready to use.

When ready to bake:

Preheat oven to 350 degrees. 

Prepare two 8-inch round cake pans.

Whisk milk, oil, eggs, coffee and vanilla in a large bowl until well mixed and slightly frothy.

Add the dry mix and whisk until just barely combined and smooth, about 50 strokes. (do not over mix)

Divide between the prepared cake pans.

Bake until set and slightly puffed and a toothpick inserted in the center comes out clean, 25 to 30 minutes.

Let cool in the pans 5 minutes, then turn out onto a cooling rack right-side up to cool completely. Enjoy it !